Please note: You will need to follow our Microsoft 365 - SSO Configuration guide before you can provision users.
Configuration
- Log in to the Microsoft Azure portal (https://portal.azure.com) as an administrator.
- Select Microsoft Entra ID from the portal menu.
- Select Enterprise applications.
- Open the existing uniFLOW Online application created to support single sign-on (see requirements).
- On the Overview page, click on 3. Provision User Accounts.
- Click on Get started.
- As Provisioning Mode, select Automatic.
- Under Admin Credentials, copy the two values from the uniFLOW Online Provisioning tab (Provisioning tenant URL and Provisioning secret token) to Tenant URL and Secret Token, respectively.
These can be found within your uniFLOW Online tenant site under Extensions > Identity Providers > Configure Identity Providers > Provisioning
Click enable user provisioning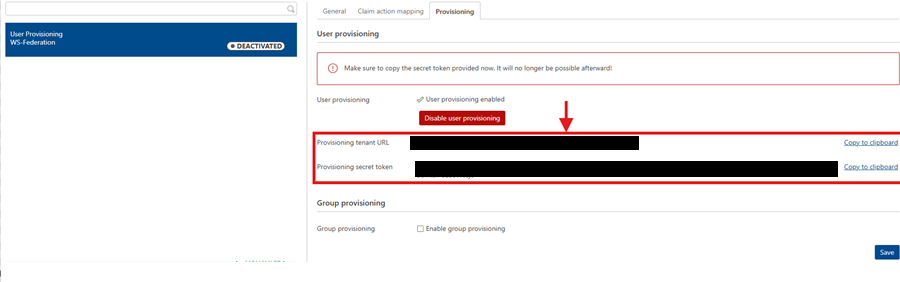
- Click on Test Connection to see if the credentials are valid, and click Save.
- Go back to Provisioning.
- Under Provisioning > Mappings, click on Provision Microsoft Entra ID Users.
- Under Provisioning > Settings, make sure Sync only assigned users and groups is selected, so that only users or groups that are assigned to the app are created and managed in uniFLOW Online.
- Go back to the overview of your created application, go to Users and groups and add the users and groups you want to create and manage in uniFLOW Online.
Before you start provisioning:
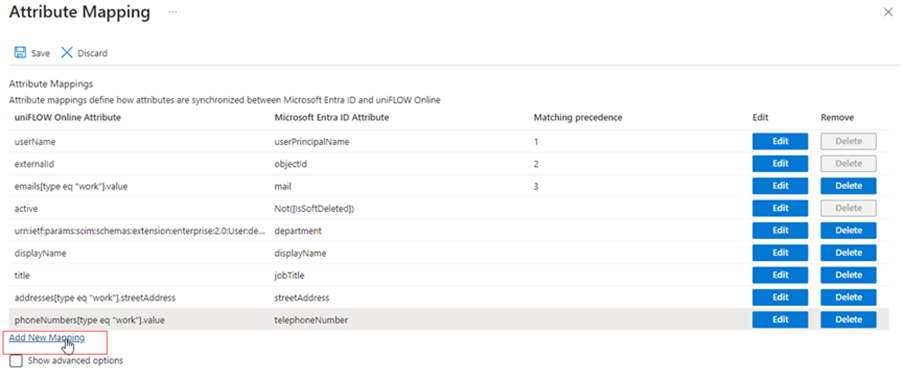
You’ll need to add a new mapping as Entra ID does not have a local username. The uniFLOW SmartClient relies on a local username to allocate prints to the correct user, so you need to use the mailNickname attribute so that it provisions the correct username within uniFLOW Online.
Add the following new mapping:
Select the following Source attribute and Target attribute
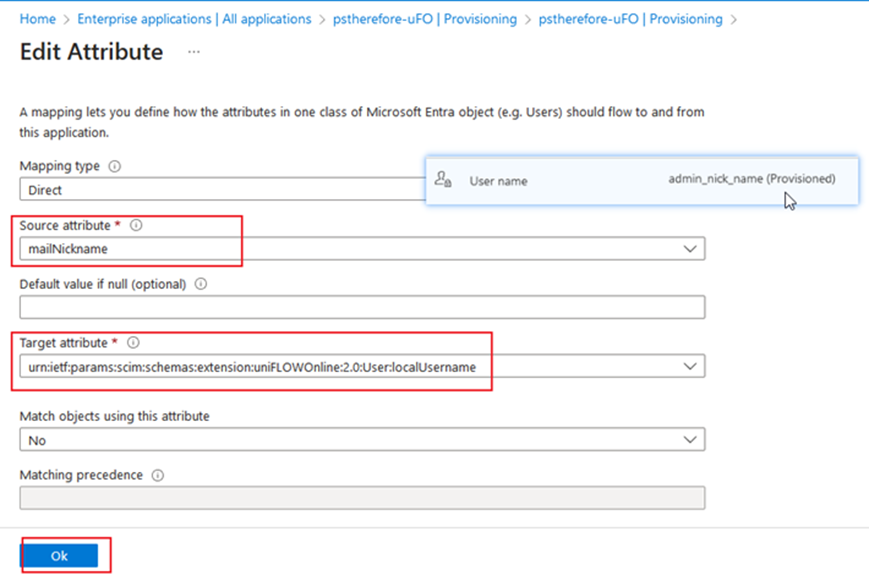
This will now provision the mailNickname attribute as the username within the users uniFLOW Online identities.
Once you are ready to start provisioning, Go to Provisioning (within the enterprise application in the azure admin portal) and click Start provisioning when you are ready. This creates missing users and updates matching users in uniFLOW Online in regular time intervals (every 40 minutes).
Was this article helpful?
That’s Great!
Thank you for your feedback
Sorry! We couldn't be helpful
Thank you for your feedback
Feedback sent
We appreciate your effort and will try to fix the article